

The EZ mitre technique
Hello all. Well I seem to have whet the appetite a bit so here goes for a 'novel' technique for making mitred boxes. Its a bit like making a box out of paper, like they showed you at school, using a 'net'. Only in 3D, with wood and a tablesaw (not sissors).
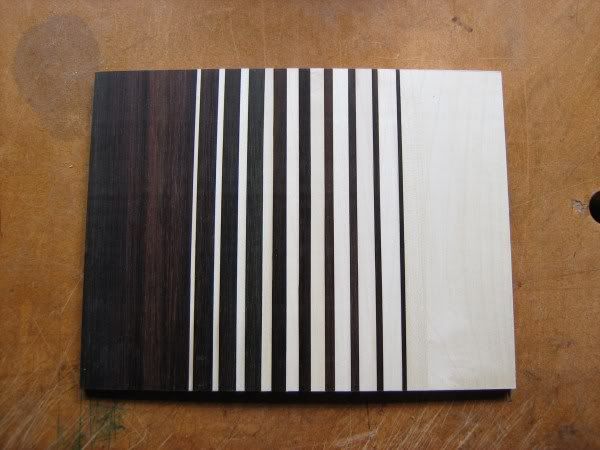
Well first comes the board
![Image]()
Its made from alternating strips of Maple and Rosewood of varying thickness. I won't bore you with the details on how to make it suffice to say that all the corners must be square and be of uniform thickness ( British English used throughout my ramblings for those new to them), in this case 6mm thick.
Its length is twice the height of the box + the length of the top of the box + two saw cut widthes.
The width of the board is twice the height + the width of the box top + two saw cuts.
All milling is done on the reverse side of the board (which ends up being the inside of the box).
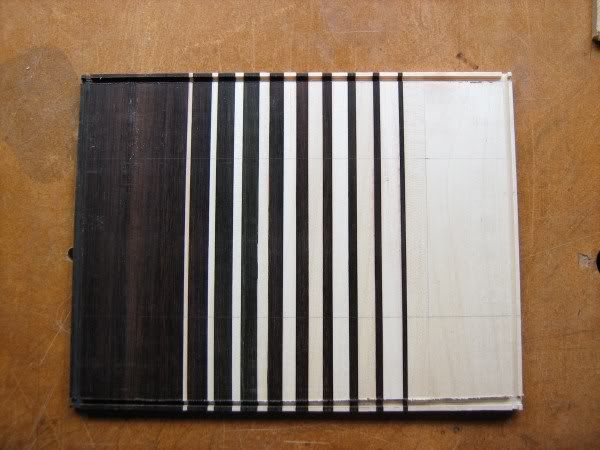
Step 1. Mill the slot for the base, 3mm in this case, 2mm from the bottom edge of the box. This slot is cut all around the edges of the board. The outside edges will become the bottom edges of the finished box, trust me I used to be an engineer.
![Image]()
Step 2. Cut a slot, all around again, wide enough to take the lipping and the cut that seperates the lid from the box, 9mm in this case. Probably better to do this one on a router table with a straight bit (cleaner finish).
![Image]()
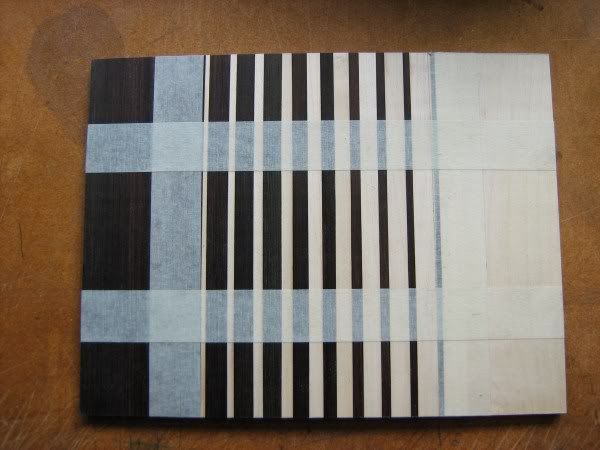
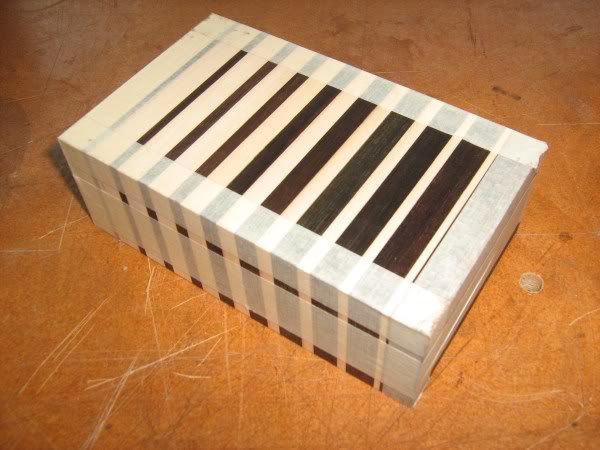
Step 3. Tape over the face (box outside) of the board, with masking tape centred on a distance from the edge of the board which is the final height of the box ( 44mm ) plus the blade width ( 2mm in this case ) ie 46mm as seen in this pic. This tape is essential in order to hold things together once the mitres are cut.
![Image]()
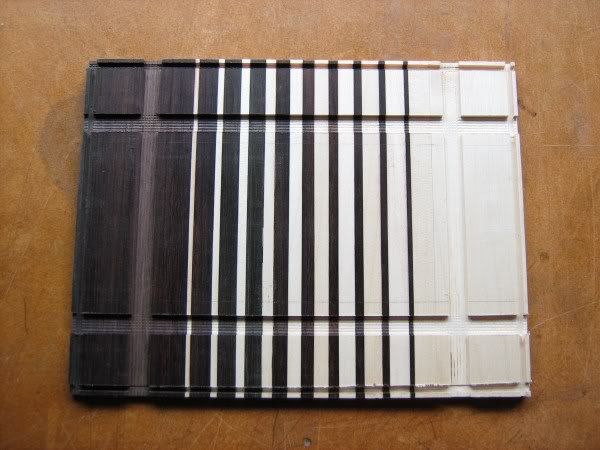
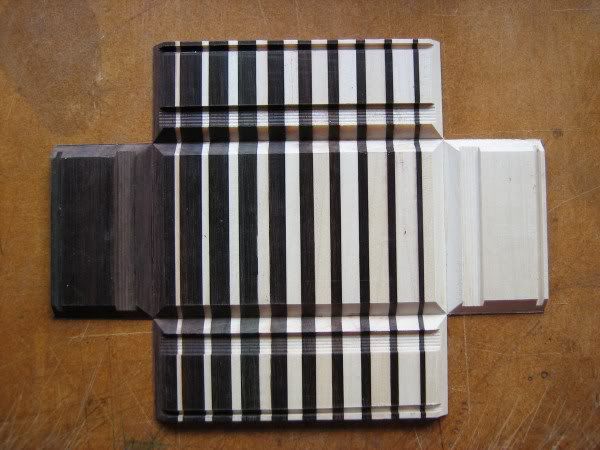
Step 4. I know none of this makes sense at this stage but stick with it. Have I ever lied to you. Next cut the mitres. Set your table saw blade at 45°. Adjust the blade height above the table to the thickness of the board. Set the fence distance to 46mm from the topmost tip of the blade at its centre as it protrudes from the table with the fence on the right side of the blade. Cut 45° slots all around the board. Move the fence to the left of the blade and set the fence to blade tip distance to exactly the same distance (46mm) as before. Make cuts all around the board again. The underside of the board should now look like this.
![Image]()
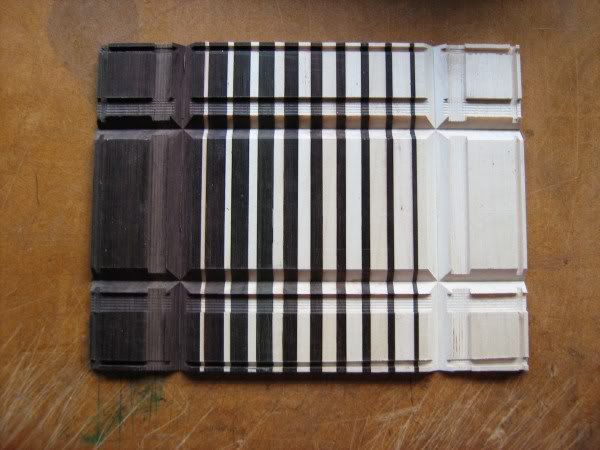
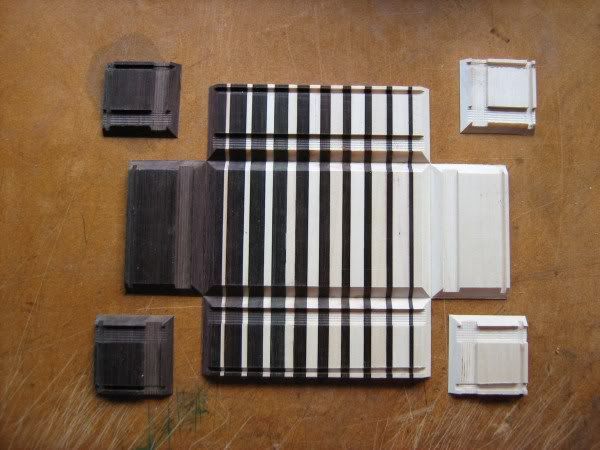
Step 5. At this stage it will be all floppy and you'll be glad you taped up where all the joins now are before you started. Using a knife cut out all four corners thus
![Image]()
And discard them
![Image]()
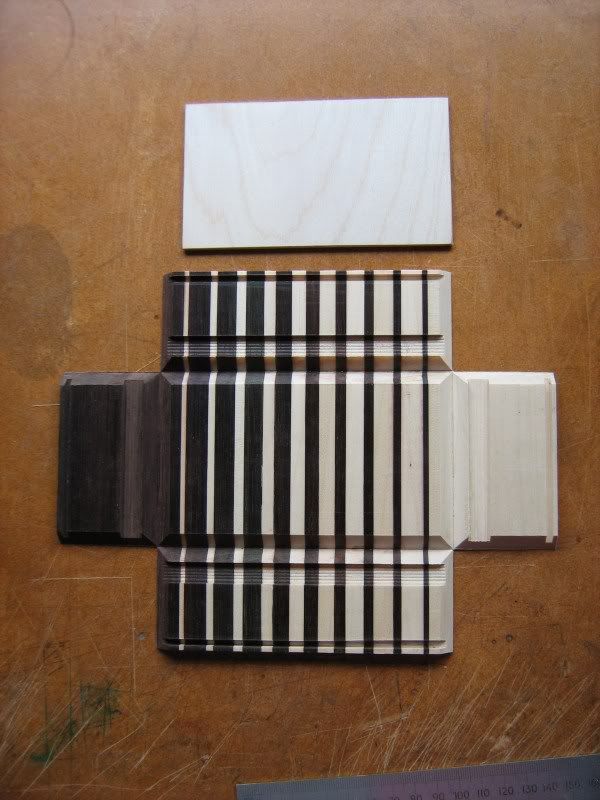
Step 6. Make a bottom for the box to fit the slots
![Image]()
Step 7. Now the box is effectively on its top at the moment. Apply glue to all mitred faces. Now, if you fold all the sides up, incorporating the bottom into the slots at the very edge as you go you will have made the box. Turn it the right way up and this is what you have
![Image]()
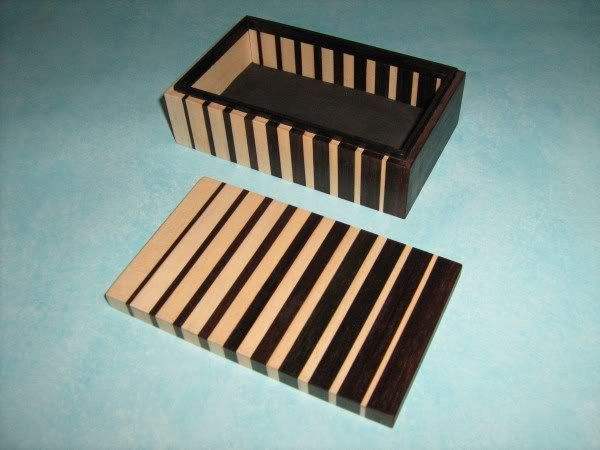
Step 8. Once the glue is dried take all the tape off, return your tablesaw blade to 90° and cut the top off. Lipping is applied to the inside of the bottom half of the box (mitred again) et voila
![Image]()
Yes well it seemed a whole lot easier when I actually did it. I expect there will be questions. I will do my best to fill in any grey areas.
Last post script. It occurs to me that this box making technique would be ideal for CNC milling.
To see how this technique can be adapted for patterns crossing the box separation cut at angles other than 90° see The Matrix blog.
For details about using router bits instead of the table saw to perform this technique see the EZ Mitre #1: Update - Using router bits blog. Having used this technique for some time now I find I prefer the router bit method, less to go wrong and only one mitre setup needed.
Many thanks to those who have tried this technique for mentioning me and for linking to this blog. I am glad you are finding it useful.
Be seeing you.
Hello all. Well I seem to have whet the appetite a bit so here goes for a 'novel' technique for making mitred boxes. Its a bit like making a box out of paper, like they showed you at school, using a 'net'. Only in 3D, with wood and a tablesaw (not sissors).
Well first comes the board
Its made from alternating strips of Maple and Rosewood of varying thickness. I won't bore you with the details on how to make it suffice to say that all the corners must be square and be of uniform thickness ( British English used throughout my ramblings for those new to them), in this case 6mm thick.
Its length is twice the height of the box + the length of the top of the box + two saw cut widthes.
The width of the board is twice the height + the width of the box top + two saw cuts.
All milling is done on the reverse side of the board (which ends up being the inside of the box).
Step 1. Mill the slot for the base, 3mm in this case, 2mm from the bottom edge of the box. This slot is cut all around the edges of the board. The outside edges will become the bottom edges of the finished box, trust me I used to be an engineer.
Step 2. Cut a slot, all around again, wide enough to take the lipping and the cut that seperates the lid from the box, 9mm in this case. Probably better to do this one on a router table with a straight bit (cleaner finish).
Step 3. Tape over the face (box outside) of the board, with masking tape centred on a distance from the edge of the board which is the final height of the box ( 44mm ) plus the blade width ( 2mm in this case ) ie 46mm as seen in this pic. This tape is essential in order to hold things together once the mitres are cut.
Step 4. I know none of this makes sense at this stage but stick with it. Have I ever lied to you. Next cut the mitres. Set your table saw blade at 45°. Adjust the blade height above the table to the thickness of the board. Set the fence distance to 46mm from the topmost tip of the blade at its centre as it protrudes from the table with the fence on the right side of the blade. Cut 45° slots all around the board. Move the fence to the left of the blade and set the fence to blade tip distance to exactly the same distance (46mm) as before. Make cuts all around the board again. The underside of the board should now look like this.
Step 5. At this stage it will be all floppy and you'll be glad you taped up where all the joins now are before you started. Using a knife cut out all four corners thus
And discard them
Step 6. Make a bottom for the box to fit the slots
Step 7. Now the box is effectively on its top at the moment. Apply glue to all mitred faces. Now, if you fold all the sides up, incorporating the bottom into the slots at the very edge as you go you will have made the box. Turn it the right way up and this is what you have
Step 8. Once the glue is dried take all the tape off, return your tablesaw blade to 90° and cut the top off. Lipping is applied to the inside of the bottom half of the box (mitred again) et voila
Yes well it seemed a whole lot easier when I actually did it. I expect there will be questions. I will do my best to fill in any grey areas.
Last post script. It occurs to me that this box making technique would be ideal for CNC milling.
To see how this technique can be adapted for patterns crossing the box separation cut at angles other than 90° see The Matrix blog.
For details about using router bits instead of the table saw to perform this technique see the EZ Mitre #1: Update - Using router bits blog. Having used this technique for some time now I find I prefer the router bit method, less to go wrong and only one mitre setup needed.
Many thanks to those who have tried this technique for mentioning me and for linking to this blog. I am glad you are finding it useful.
Be seeing you.
")


