

When you first buy a carpenter's square, chances are the it's not really square. Well, maybe square enough for rough carpentry but not for wood working.
Squaring them takes only a hammer, center punch, pencil and a piece of plywood (or any piece of wood with a straight edge).
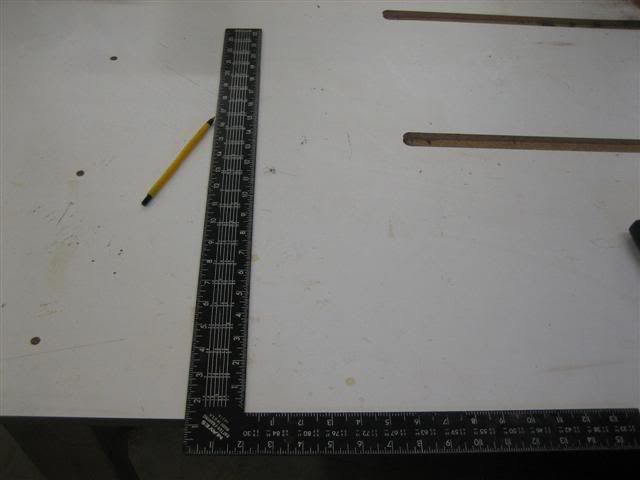
First use your square along the straight edge and draw a line along the full lenght of the square.
.
![Image]()
.
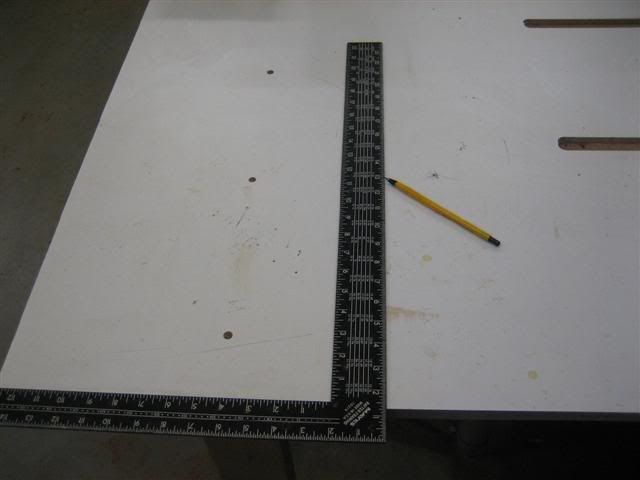
Then flip the square over and draw another one. Make sure that leave enough space that can see your first your first line.
If your lines are perfectly parallel then your square is square.
.
![Image]()
.
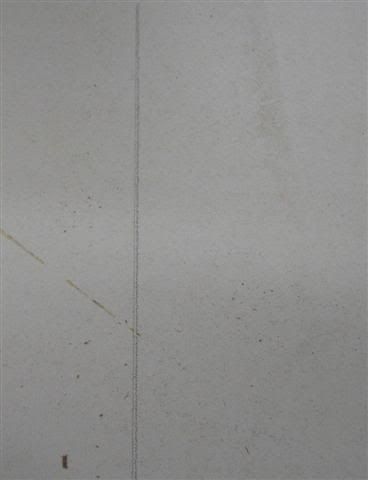
If not then you have a little work to do. As you can see from my sample below the lines are closer at the top compared to the bottom.
.
![Image]()
.
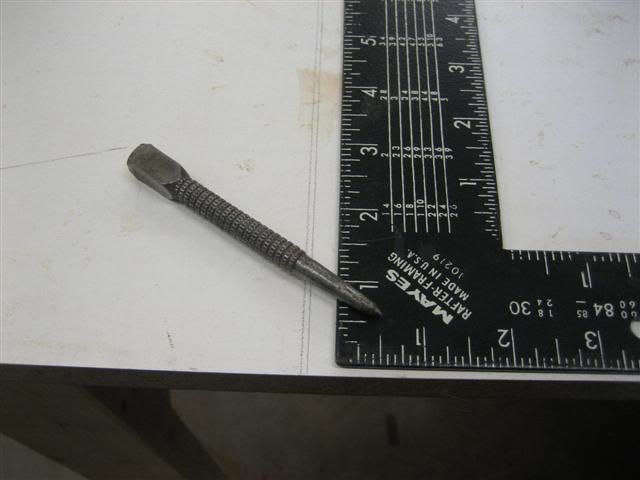
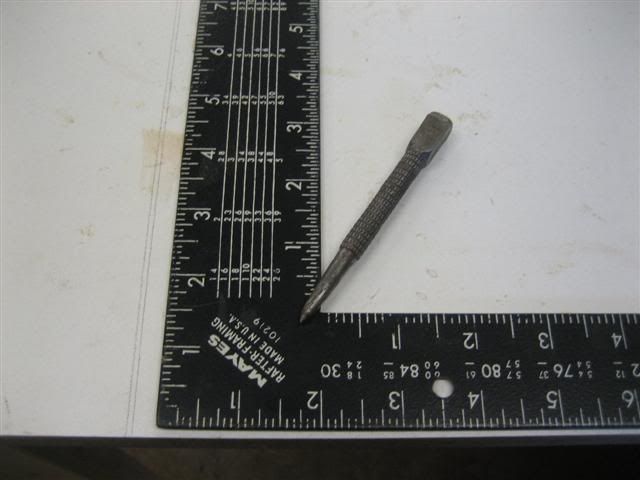
Here is where you use the centerpunch. When you punch a dimple in the square it causes the metal to expand slightly.
So for the example above you punch near the outside of the corner (as shown below), it would cause the square to close up the angel a little bit.
Draw your lines again and if still not square, keep doing it until it is square. Make the new dimples next to, but not in the same dimple.
Punching dimples as shown below would cause the part of the square at the top of the picture to move to the right.
.
![Image]()
.
If you lines were farther apart at the top then you need to open up the angle a little bit. Use your punch close to the inner corner instead as shown below.
.
![Image]()
.
.
Before I forget, there is a little book written in 1883 all about the steel square. Copyright has long ago expired.
I would do a right click and "save targes as", since it's about 18megs
Steel Square book
Squaring them takes only a hammer, center punch, pencil and a piece of plywood (or any piece of wood with a straight edge).
First use your square along the straight edge and draw a line along the full lenght of the square.
.
.
Then flip the square over and draw another one. Make sure that leave enough space that can see your first your first line.
If your lines are perfectly parallel then your square is square.
.
.
If not then you have a little work to do. As you can see from my sample below the lines are closer at the top compared to the bottom.
.
.
Here is where you use the centerpunch. When you punch a dimple in the square it causes the metal to expand slightly.
So for the example above you punch near the outside of the corner (as shown below), it would cause the square to close up the angel a little bit.
Draw your lines again and if still not square, keep doing it until it is square. Make the new dimples next to, but not in the same dimple.
Punching dimples as shown below would cause the part of the square at the top of the picture to move to the right.
.
.
If you lines were farther apart at the top then you need to open up the angle a little bit. Use your punch close to the inner corner instead as shown below.
.
.
.
Before I forget, there is a little book written in 1883 all about the steel square. Copyright has long ago expired.
I would do a right click and "save targes as", since it's about 18megs
Steel Square book


