Lining Off - Second Attempt
I finished lining off the planks today. Lining off is the process with which you project the final plank layout onto the hull. My first attempt at this didn't go so well. Thanks to some suggestions from some fellow lumberjocks, I took the time to learn more about the process and I'm much happier with the results. The book, Building Small Boats by Greg Rossel, as recommended by DaveR, is an exceptional resource and I basically used the process in the lining off chapter.
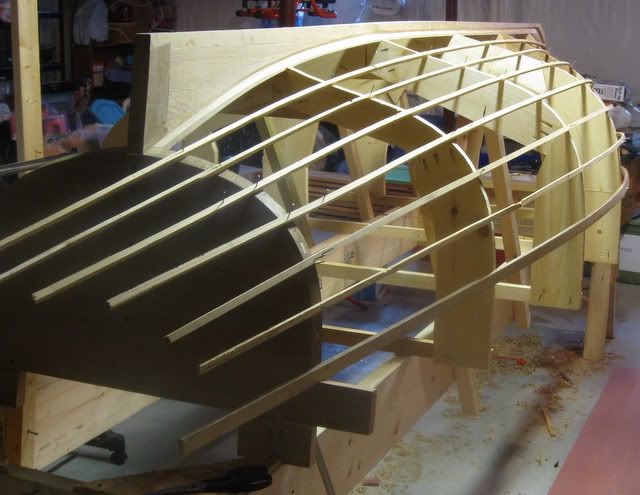
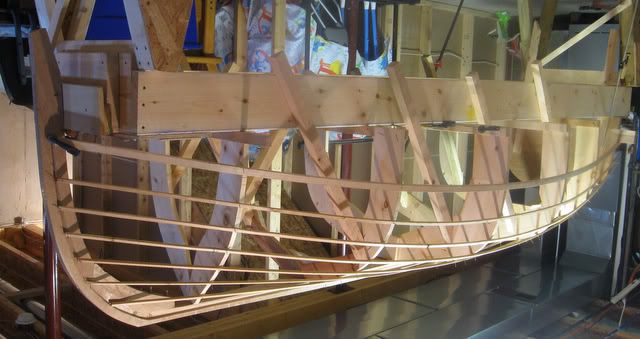
Results
First, here are my final results of the lining off. The temporary battens running down the hull are the outlines for each of the 7 planks.
What makes a good lapstrake
It turns out there are many considerations that go into making a lapstrake hull a nice thing to look at. Of course, the shapes and edges of the planks are high on the list. After a lot of research, I settled on 4 key aesthetic qualities that I want in the planking. It wasn't until I had a handle on these "rules" that I felt that I could do this properly. In order of importance:
- Perfectly even plank widths along the transom and stem, except for the sheer (top) plank which will be made 1.5" wider.
- The effect of the rubrail (outwale) on the sheer plank will make the sheer plank appear thinner, so I've added the width of the rubrail to the sheer plank.
- All plank edges should follow a smooth fair curve with no dips or fishtails, etc.
- The variation of the average widths of the planks above the garboard along the entire length of the boat should be minimized as much as reasonably possible. This is accomplished by making the garboard wider in the middle.
The Process
The process starts with marking out the plank widths at even intervals along the transom and stem, keeping in mind that the sheer plank will be 1.5" wider to compensate for the rubrail.
Next, the bottom most plank, the garboard, is lined off using a long batten to shape a curve between the fixed marks on the transom and sterm. The curve is made by eye. I tried to create a nice flowing curve along the length while maximizing the width of the garboard (within reason) at the center stations. The width in the center will help make the planks above the garboard narrower.
Once the garboard is lined off, it's position is marked on all stations and a long temporary batten is tacked on to represent the plank edge. This leaves 6 remaining planks. The next step is to mark out the 6 remaining intervals on the stations. Greg Rossel suggests using a paper tape and a diminishing device to mark out the intervals. First, the paper is wrapped around a station mold starting from the top of the garboard. A mark is placed on the paper strip where the bottom of the rubrail will go. So, this gives me a measurement on the paper strip that represents the top of garboard and bottom of rubrail. Next, I just need to mark out even intervals between these points. Sure.. it would be possible to just divide the measurement by 6 and mark off the intervals on the tape/station mould, but a cooler way to do it is with a diminishing device, a technique that is certainly not confined to just boatbuilding.
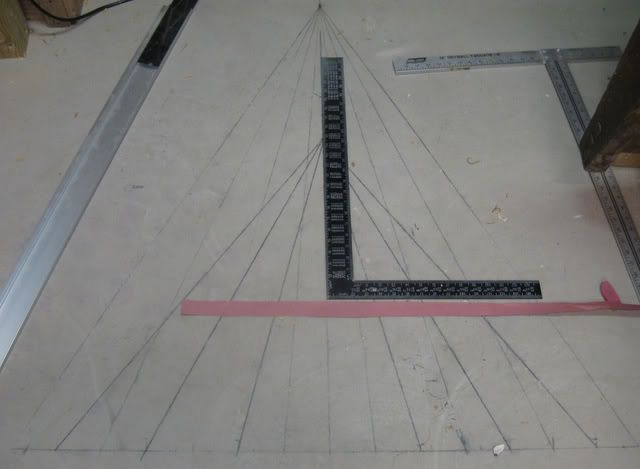
Diminishing Device
The diminishing device is just a drawing of an isosceles triangle. The base is divided at evenly spaced intervals and lines are drawn from those divisions to the apex. It can be used to perfectly mark out evenly spaced intervals along any length without the use of any math. So, this is helpful to mark out even intervals at each station (especially helpful as I had to do this process 3 times). The paper strip (with the length of the station marked on it) is fitted to a diminishing device and marks are transferred to the strip. The strip taken back to the station mold and the marks are transferred to the station mold. There are 2 devices overlapping below, one for 7 planks (for the stem and transom) and the shorter one for 6 planks (for the stations).
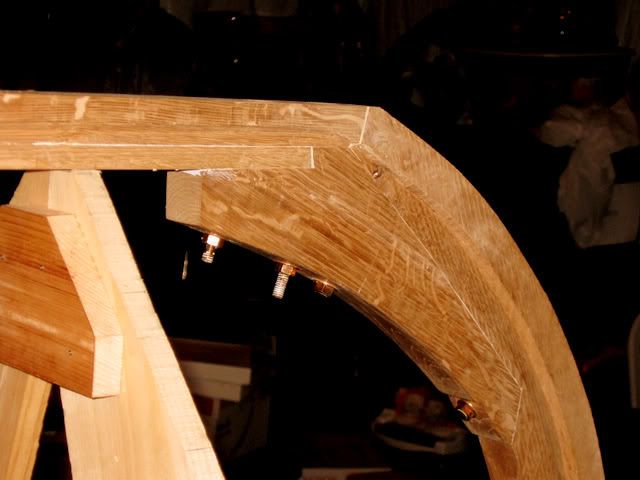
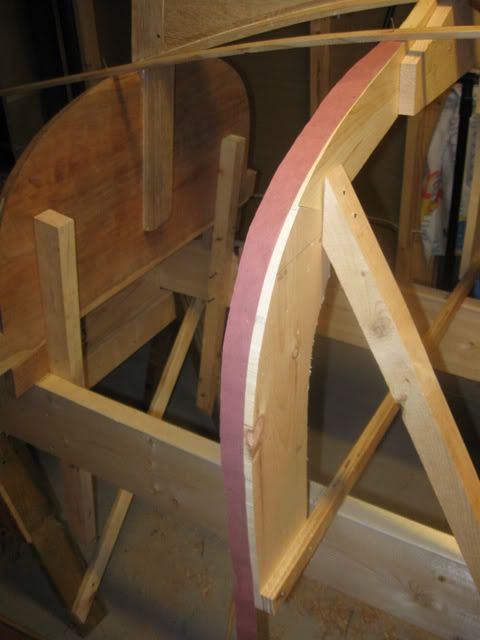
Planks at the stem
After all the stations are marked, battens are tacked onto the marks. The battens are sighted to make sure they follow a nice fair curve.
I think I've got it this time. Nice evenly spaced lines that flow into the stem.
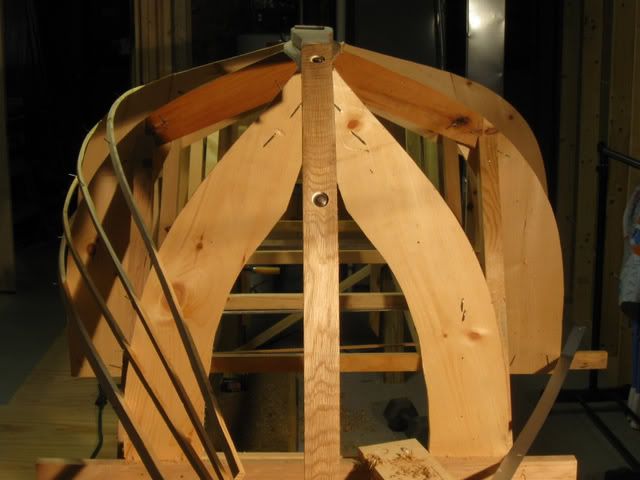
Final Results
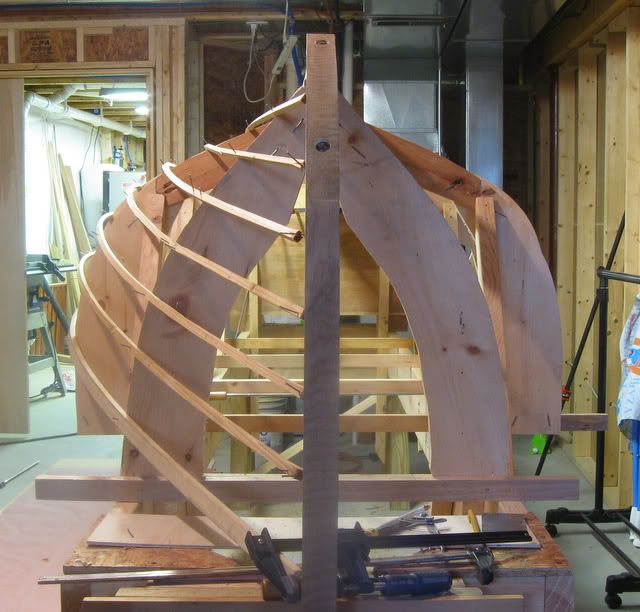
Does the photo below look a little odd? Well. It's a picture I took looking up from the floor upside down. This is what the boat will look like when it's flipped over. It was helpful to do this and get a confirmation on the layout. I'm very happy with this. Nice evenly spaced planks. Easy flow into the stem. Did the sheer plank right. I found so many ways to do this wrong, so it's great that it looks -right- finally! (at least to me and in my shop)
And that's it for now!
Materials List:
None for this step!
Project Materials Summary:
- Plans and Book: $60
- Lofting Supplies: $47.88
- Mold Supplies: $36
- Strongback Lumber: $33
- Transom Materials: $22
- Stem and Knee: $47
- Keelson, Keel, Skeg and Sternpost: $97
- Silicon Bronze Hardware: $225
- Larch Planking and Copper Rivets: $325
- Total Project Expenses so far: $892.88
Labor Hours Summary:
- 05/29/09 - 06/08/09: Lofting - 12 Hours
- 06/14/09 - 06/20/09: Building Molds: 5 Hours
- 06/25/09 - 06/27/09: Building Strongback: 7.5 Hours
- 06/30/09 - 07/13/09: Building Transom: 6 Hours
- 07/14/09 - 07/20/09: Stem Lofting Detail: 3 Hours
- 07/22/09 - 07/29/09: Stem and Knee Cutout: 4 Hours
- 07/30/09 - 08/16/09: Keel, Keelson, Skeg and Sternpost: 21 Hours
- 08/16/09 - 09/05/09: Attaching Transom: 3 Hours
- 09/28/09 - 09/29/09: Cutting Stem and Keel Rabbet, 9 Hours
- 09/30/09 - 10/04/09: Stem to Keel and Lining Off, 4 Hours
- 11/14/09 - 11/15/09: Lining Off, 6 Hours
- Total Project Labor Hours so far: 80.5 Hours
- Time since starting project: 170 days (5 months 17 days)