

Building a Murphy Bed from scratch
We need a Murphy bed next winter in Arizona and I did not want to buy the hardware. That takes all the fun out of designing it yourself and costs $360. So I looked at a lot of bed designs and settled on one that used HD pivots, gas springs for counterbalance and a swing out leg support rather than the fold down kind.
The parameters were a twin mattress (7×39 x 75), had to flip long ways and enough room inside for making the bed. Then I had to decide on the pivot points, the foot pivot center and the gas spring attachment points.
I started with this drawing of the swing pattern:
![Image]()
Then I made a mock up of the pivot section and used the other end for the swing leg development.
![Image]()
I cut some steel and started making the components. I made a pattern of the swing leg and bent some tubing and solid round bar to combing for each curved leg. The tubing has solid in both ends and is welded together.
![Image]()
![Image]()
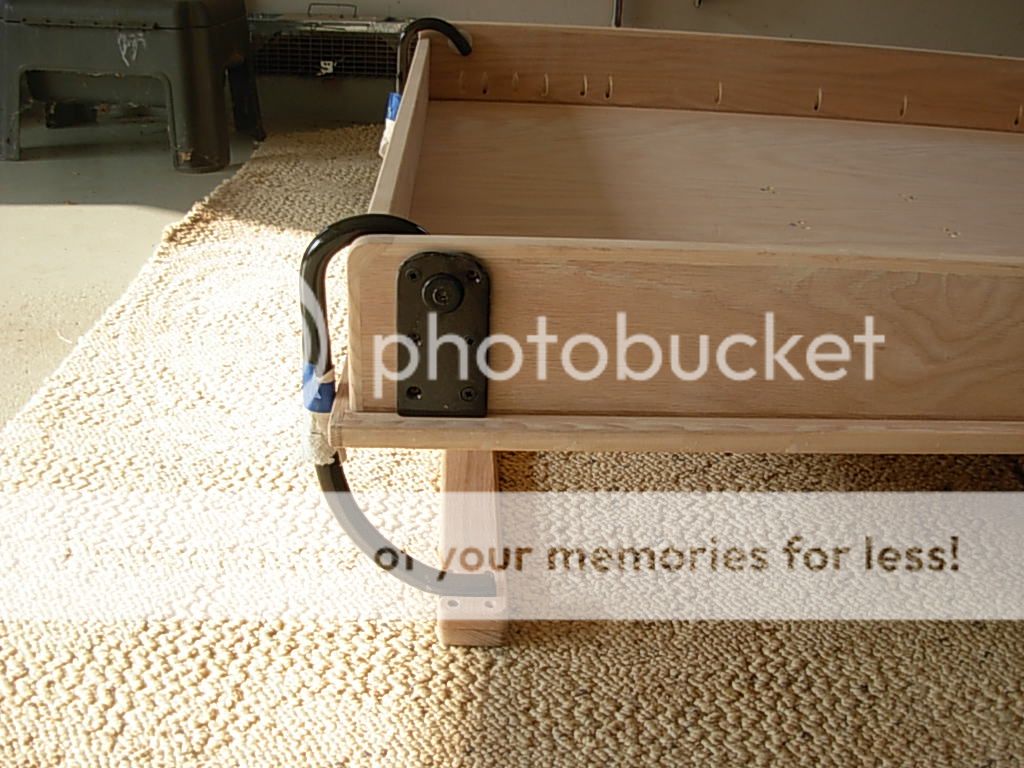
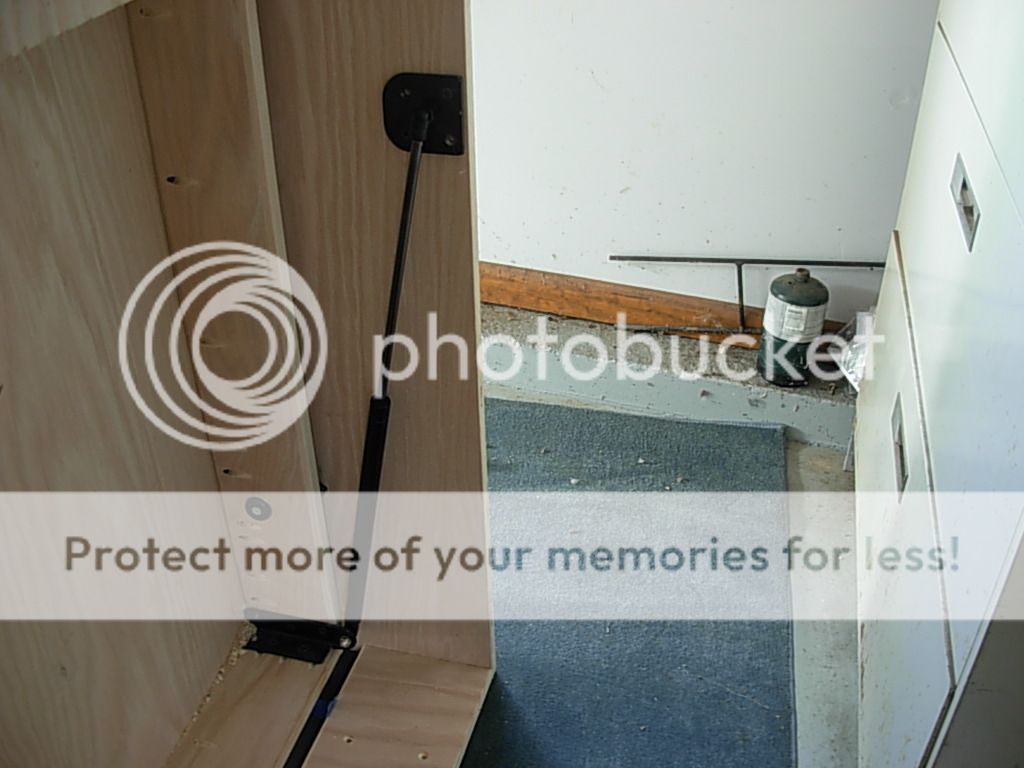
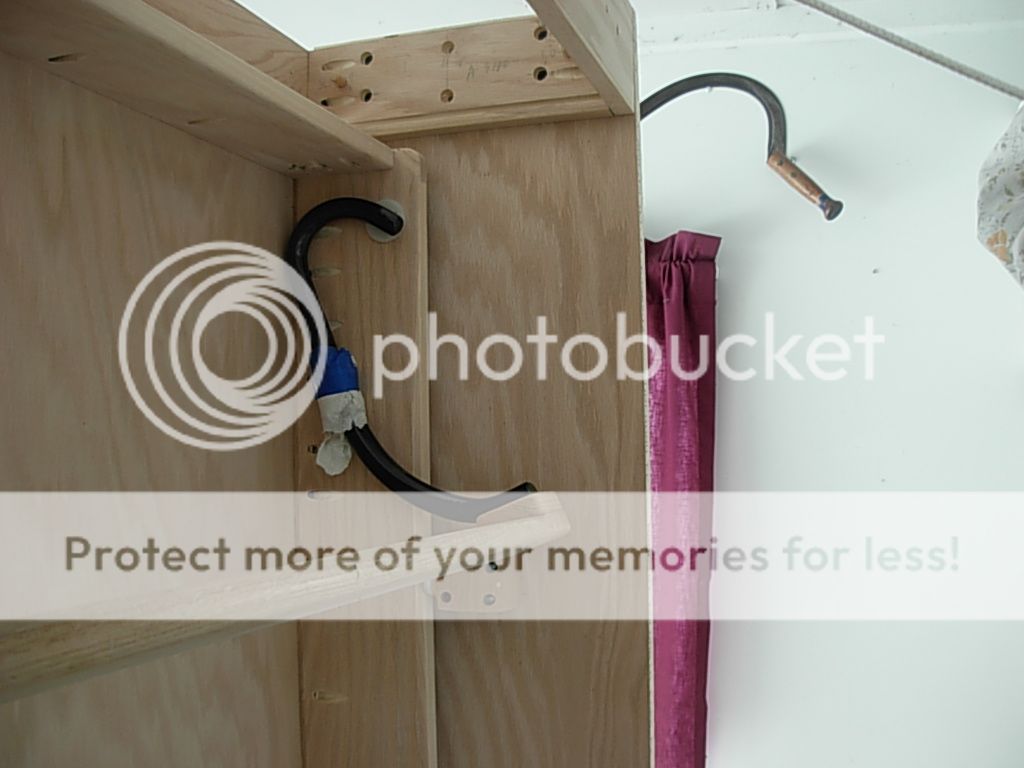
After It was tried out and proven, I started on the full size parts. I did make one mistake in clearance for the gas spring. I only left a 1" space between the inside of the vertical wall and the outside of the mattress frame. It should have been 1 1/2" so I had to relocate the gas spring on a bracket in the corner.
This is the bracket in the inside corner and the shot of the pivot mounted without the wall on yet.
(You have to right mouse and hit view image to see that ball and bracket)
![Image]()
Most of the sizes of everything was planned. The walls are 3/4×13 x 85 1/2.
The bed board is 3/4×44 1/2×80 The Frame for the mattress is 3/4X 5 except the end which is 3/4×4 to clear the swing foot. It is designed with 1/4" clearance on the sides. 1" on the bottom and 1/2" on the top.
The handles and stops were the only things that were designed on the fly ( like I usually do things) but this had to be predetermined everywhere.
The pivot is 10 1/2" up from the floor. The travel of the gas spring needs to be at least 11 11/16- the springs are 12" travel and 45#. I had 90# springs and they seemed to be too much on my mock up so I returned them. I think the correct force for this would be around 70#. That was information that I could not find anywhere and it is not in the literature for the purchased packages and they would not tell me on the phone.
All the parts are made from 3/4 red oak plywood and edgebanded with 3/8" solid oak. The bed box is fastened together with Kreg pocket screws ( lots of them) . When it is re assembled in Az., I will put a bead of glue under all the frame sides before screwing it down. The frames also have blind dowels in them for locating before screwing them in place.
When assembling the bed to the sides, the outer frame has to be apart so the pivots can fit into the bushings and then get caps screwed on on the inside then the bottom, back and top box are screwed to the vertical sides to make the outer frame.
To assemble the gas springs, they hook over a 10mm ball on each end and the bed has to be pushed back about 3" into the frame to hook the top ends on without pressure on them. For that, the stops have to be removed before you hook them on. The stops have blind dowels and 4 screws each.
The handles were made last out of cherry and are blind doweled in location and have 6 screws holding each of them on.
Here is the finished bed assembled in the garage because my shop ceiling is too low.
The handles are spaced apart because there may be trim added to make the bed look like 2 doors with handles
![Image]()
![Image]()
The stop:
![Image]()
The foot and its bracket:
![Image]()
The gas spring at rest:
![Image]()
The gas spring compressed
![Image]()
The mounting of the top box ( the bottom is not installed yet). I have 2 removable dowels on each side and six screws on each side:
![Image]()
Here is the foot pulled inside when the bed is raised into the store position:
![Image]()
I'll post this as a project when it is finished and installed at the High Chaparral in Arizona city
......................Cheers, Jim
We need a Murphy bed next winter in Arizona and I did not want to buy the hardware. That takes all the fun out of designing it yourself and costs $360. So I looked at a lot of bed designs and settled on one that used HD pivots, gas springs for counterbalance and a swing out leg support rather than the fold down kind.
The parameters were a twin mattress (7×39 x 75), had to flip long ways and enough room inside for making the bed. Then I had to decide on the pivot points, the foot pivot center and the gas spring attachment points.
I started with this drawing of the swing pattern:

Then I made a mock up of the pivot section and used the other end for the swing leg development.

I cut some steel and started making the components. I made a pattern of the swing leg and bent some tubing and solid round bar to combing for each curved leg. The tubing has solid in both ends and is welded together.


After It was tried out and proven, I started on the full size parts. I did make one mistake in clearance for the gas spring. I only left a 1" space between the inside of the vertical wall and the outside of the mattress frame. It should have been 1 1/2" so I had to relocate the gas spring on a bracket in the corner.
This is the bracket in the inside corner and the shot of the pivot mounted without the wall on yet.
(You have to right mouse and hit view image to see that ball and bracket)

Most of the sizes of everything was planned. The walls are 3/4×13 x 85 1/2.
The bed board is 3/4×44 1/2×80 The Frame for the mattress is 3/4X 5 except the end which is 3/4×4 to clear the swing foot. It is designed with 1/4" clearance on the sides. 1" on the bottom and 1/2" on the top.
The handles and stops were the only things that were designed on the fly ( like I usually do things) but this had to be predetermined everywhere.
The pivot is 10 1/2" up from the floor. The travel of the gas spring needs to be at least 11 11/16- the springs are 12" travel and 45#. I had 90# springs and they seemed to be too much on my mock up so I returned them. I think the correct force for this would be around 70#. That was information that I could not find anywhere and it is not in the literature for the purchased packages and they would not tell me on the phone.
All the parts are made from 3/4 red oak plywood and edgebanded with 3/8" solid oak. The bed box is fastened together with Kreg pocket screws ( lots of them) . When it is re assembled in Az., I will put a bead of glue under all the frame sides before screwing it down. The frames also have blind dowels in them for locating before screwing them in place.
When assembling the bed to the sides, the outer frame has to be apart so the pivots can fit into the bushings and then get caps screwed on on the inside then the bottom, back and top box are screwed to the vertical sides to make the outer frame.
To assemble the gas springs, they hook over a 10mm ball on each end and the bed has to be pushed back about 3" into the frame to hook the top ends on without pressure on them. For that, the stops have to be removed before you hook them on. The stops have blind dowels and 4 screws each.
The handles were made last out of cherry and are blind doweled in location and have 6 screws holding each of them on.
Here is the finished bed assembled in the garage because my shop ceiling is too low.
The handles are spaced apart because there may be trim added to make the bed look like 2 doors with handles


The stop:

The foot and its bracket:
The gas spring at rest:
The gas spring compressed

The mounting of the top box ( the bottom is not installed yet). I have 2 removable dowels on each side and six screws on each side:

Here is the foot pulled inside when the bed is raised into the store position:
I'll post this as a project when it is finished and installed at the High Chaparral in Arizona city
......................Cheers, Jim

")


