

Cutting board build blog.
I recently uploaded pictures of a cutting board (http://lumberjocks.com/projects/30543) and several fellow LJs asked me to show how it was put together. Subsequently, Patron quickly deduced the process and wrote a nice blog showing the step by step process for how to achieve the pattern. I encourage anyone who is interested to take a look because he has some nice pictures outlining the process. http://lumberjocks.com/patron/blog/15074. I thought I would add a short amendment to his blog describing how I built my specific pattern.
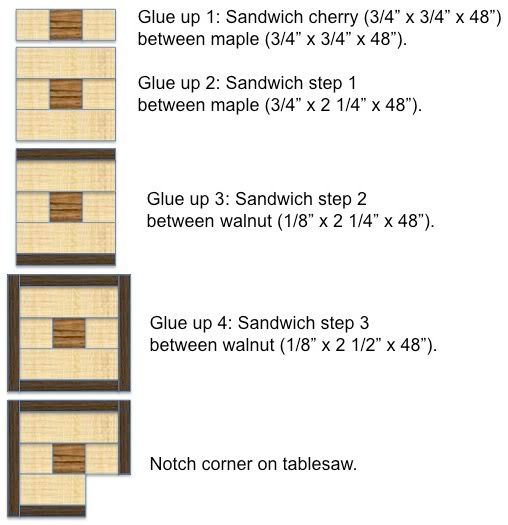
Importantly, the dimensions I have listed are the approximate final dimensions. The pre-glue up dimensions were typically 1/8" oversize so that I had some extra wood for scraping, planing, and resquaring after each step. Also, I list a 4' length. I chose that length because it was easy to handle, but you'll need about 8' to make a full size cutting board. SO DOUBLE IT. The final dimensions are not critical. The most important part is that it is perfectly square. The size of the notch is also not critical, it just needs to be perfectly square.
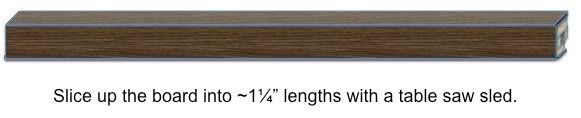
Slice it up like a loaf of french bread.
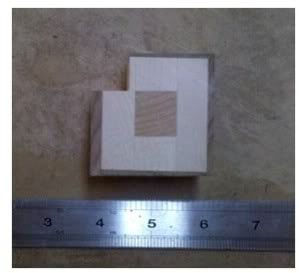
This is what a block looks like.
Here is a picture of my gluing jig.
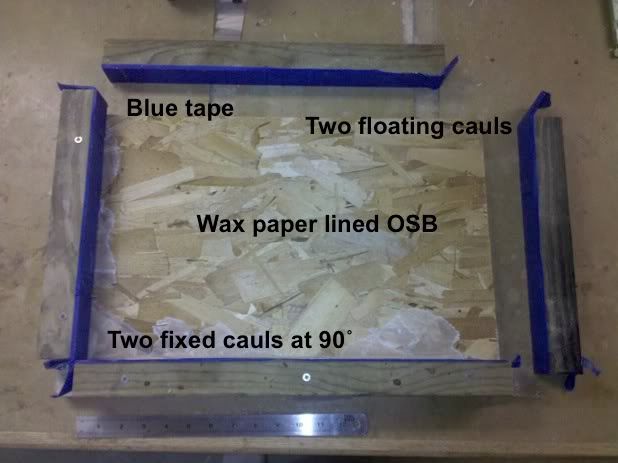
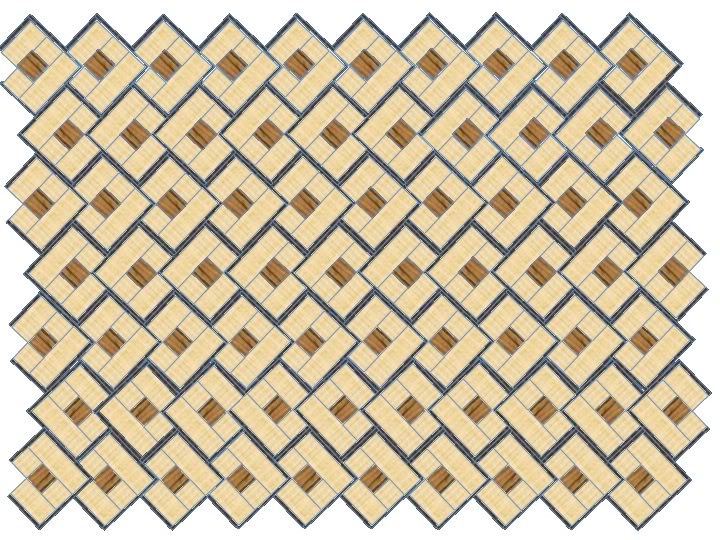
This is about what it looks like after gluing. I used titebond III. Make sure you have plenty of glue, have everything set up the way you like it off to the side of jig, and move quickly. I got my wife to help for the second one.
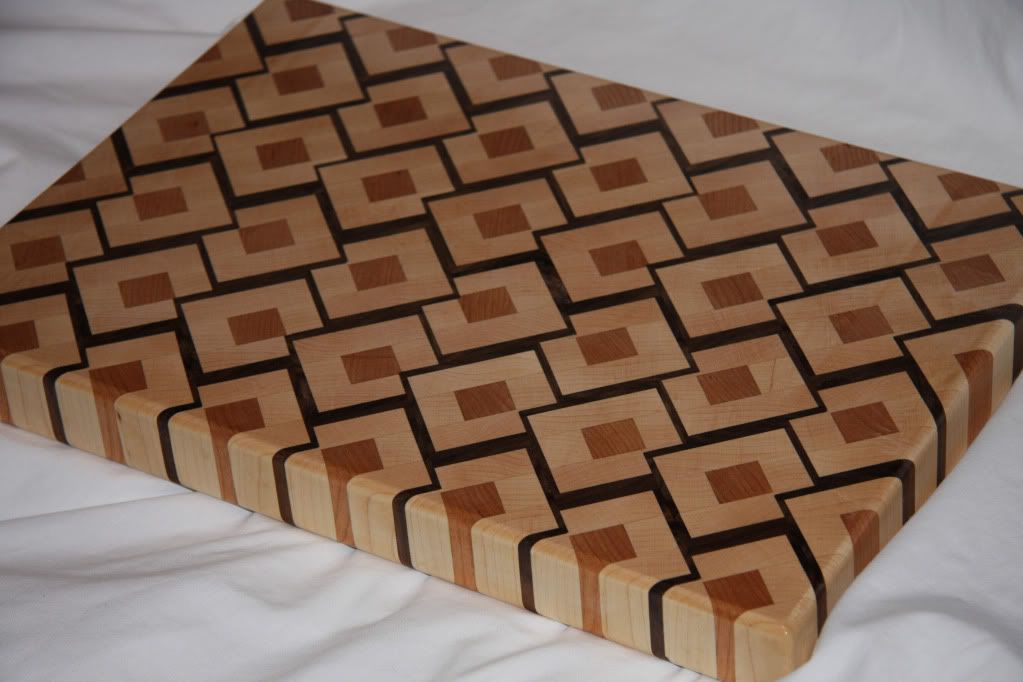
Square it up one last time, round over the edges, a little sanding, and it's all done. I finished mine with 2 coats of Watco Butcher Block oil.
I recently uploaded pictures of a cutting board (http://lumberjocks.com/projects/30543) and several fellow LJs asked me to show how it was put together. Subsequently, Patron quickly deduced the process and wrote a nice blog showing the step by step process for how to achieve the pattern. I encourage anyone who is interested to take a look because he has some nice pictures outlining the process. http://lumberjocks.com/patron/blog/15074. I thought I would add a short amendment to his blog describing how I built my specific pattern.
Importantly, the dimensions I have listed are the approximate final dimensions. The pre-glue up dimensions were typically 1/8" oversize so that I had some extra wood for scraping, planing, and resquaring after each step. Also, I list a 4' length. I chose that length because it was easy to handle, but you'll need about 8' to make a full size cutting board. SO DOUBLE IT. The final dimensions are not critical. The most important part is that it is perfectly square. The size of the notch is also not critical, it just needs to be perfectly square.
Slice it up like a loaf of french bread.
This is what a block looks like.
Here is a picture of my gluing jig.
This is about what it looks like after gluing. I used titebond III. Make sure you have plenty of glue, have everything set up the way you like it off to the side of jig, and move quickly. I got my wife to help for the second one.
Square it up one last time, round over the edges, a little sanding, and it's all done. I finished mine with 2 coats of Watco Butcher Block oil.
")


