

$12 Incremental Stop Block
An incremental stop block is a stop block for a fence that can be moved in precise increments or can be removed and then returned to exactly the same spot at a later time. This is how Incra got its name. I am too cheap to buy an Incra fence, so instead I spend hours trying to save a buck or two. Go figure. I mostly like the feature of being able to put the stop block exactly back where I had it earlier - and I use pencil marks, not the ruler.
I had posted an incremental stop block a couple of years ago in a blog that used threaded rod. While it worked OK, it had a couple of problems; it wasn't strong enough for heavy use and it wasn't portable to a new fence once the old fence wore out. I wore it out.
So I decided to go simple and strong with a new design. I went and peeked around the Incra website and found the replacement racks for some of their fences. These are plastic like Legos, but have precision teeth on one surface that are spaced 1/32 inch apart. They are 6 inches long and attach with two screws. When two racks are mated to each other they are really locked in place. They are very durable while only costing $2 each. So I bought 10 of them, and used five for this project.
I bought them by going to this web address:
http://www.incrementaltools.com/PARTS_INCRA_Wonder_Fence_p/pc-wonderfence.htm
And then selecting item number 16 from the pull down list on the right hand side:
ID#16 - PULT - 500600 [Add $1.95]
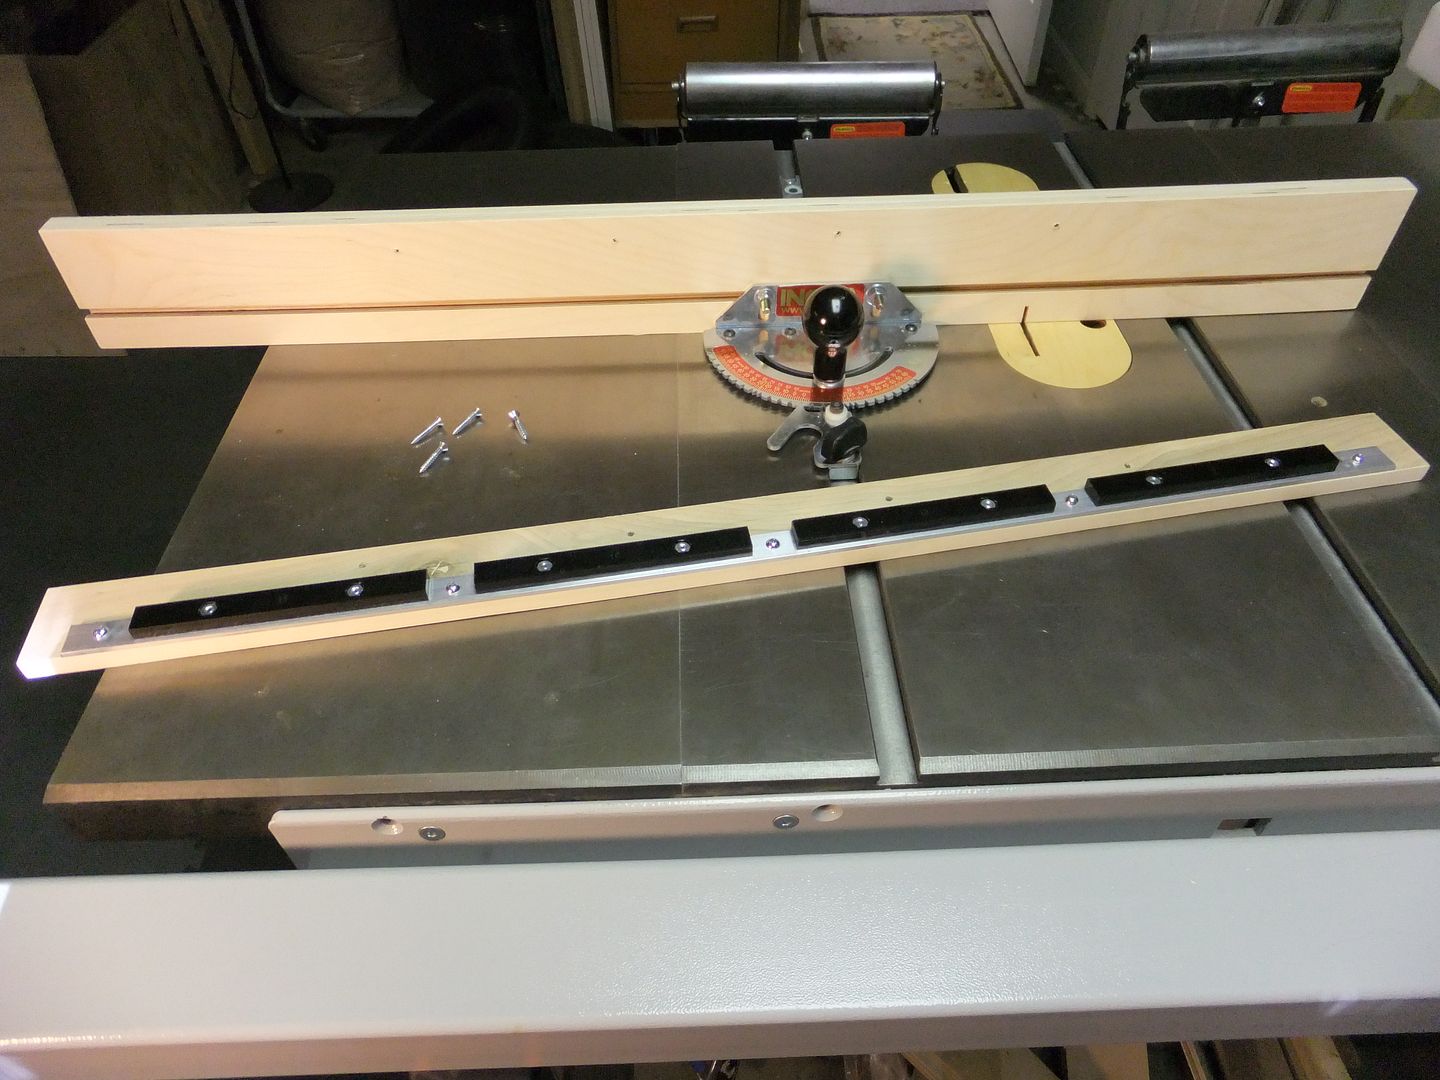
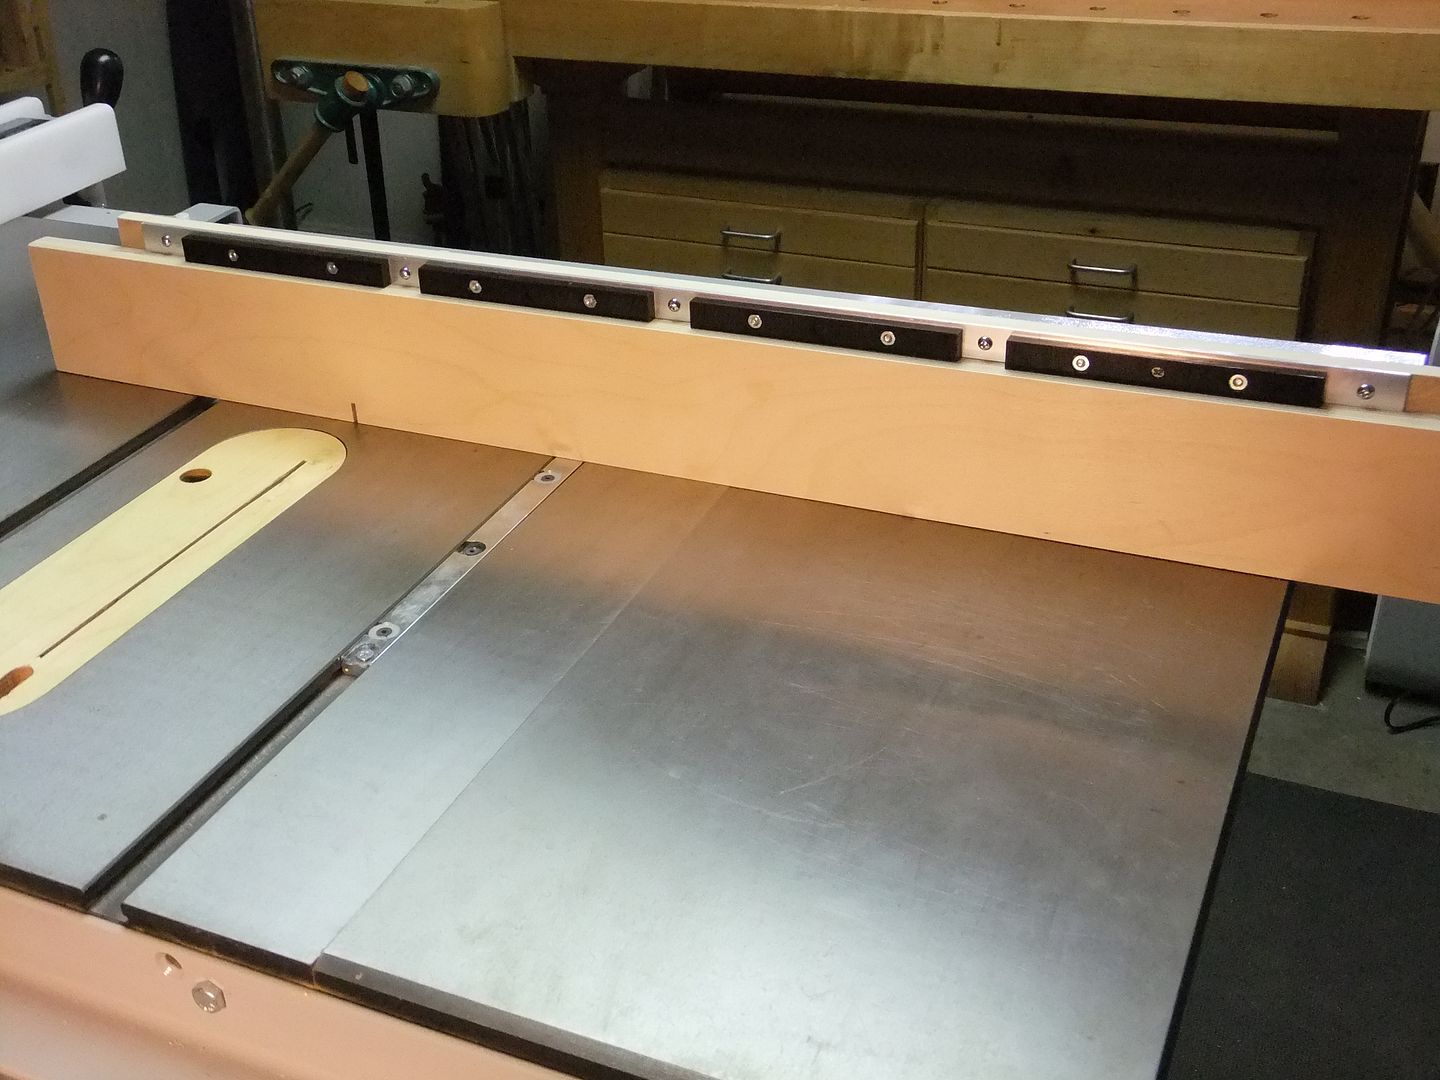
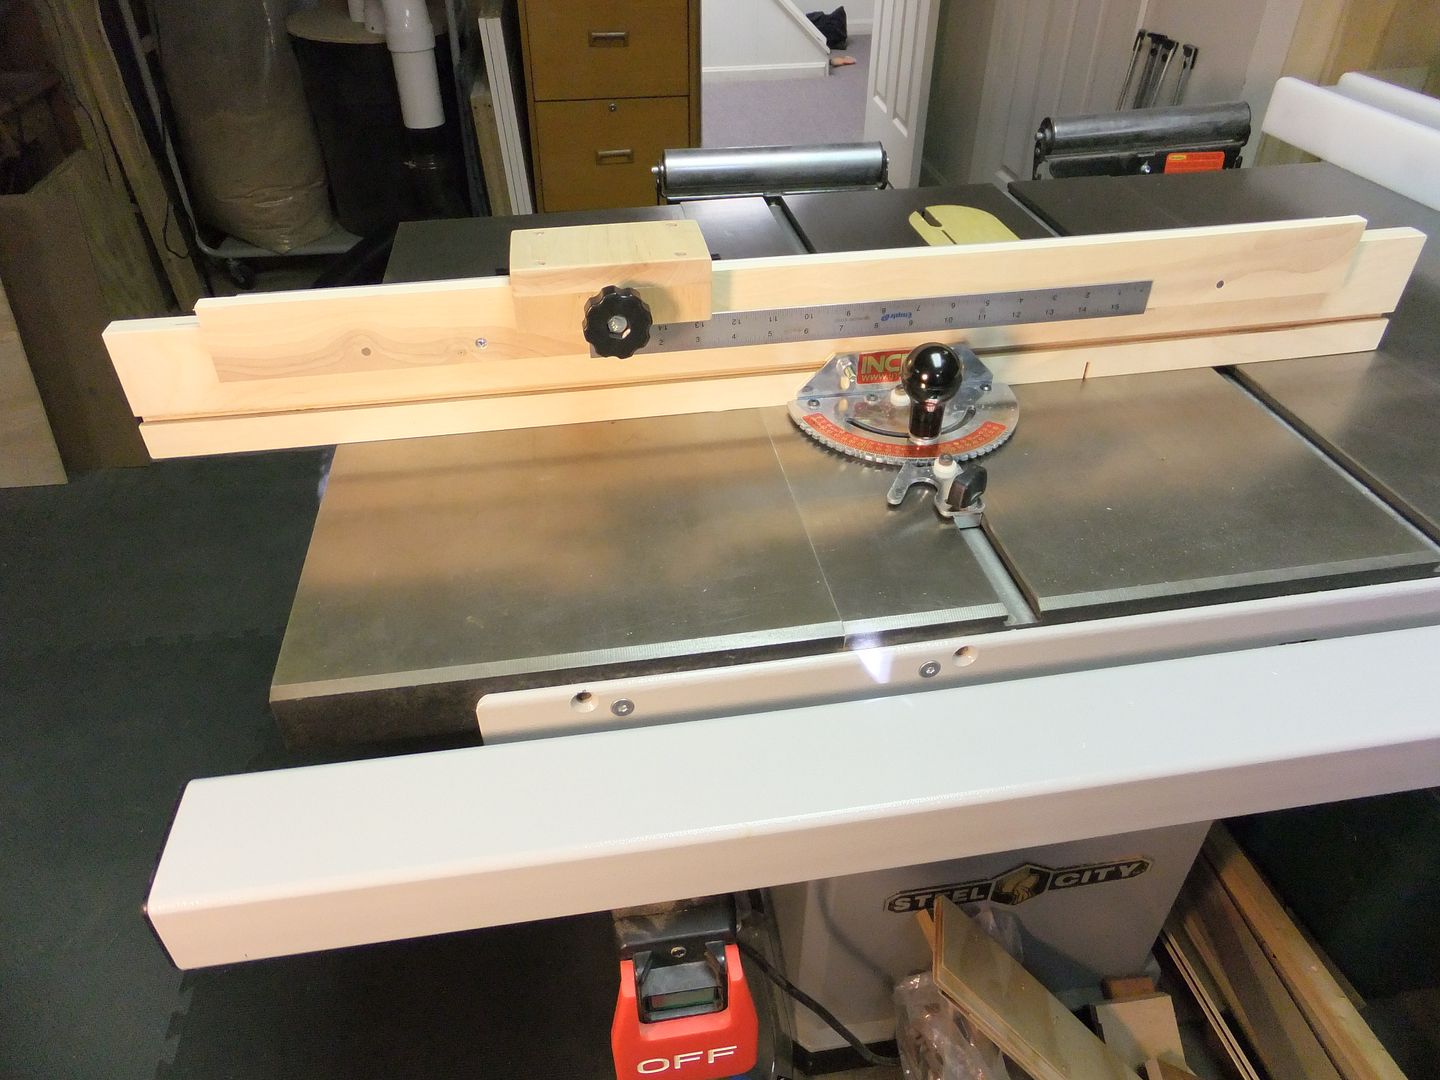
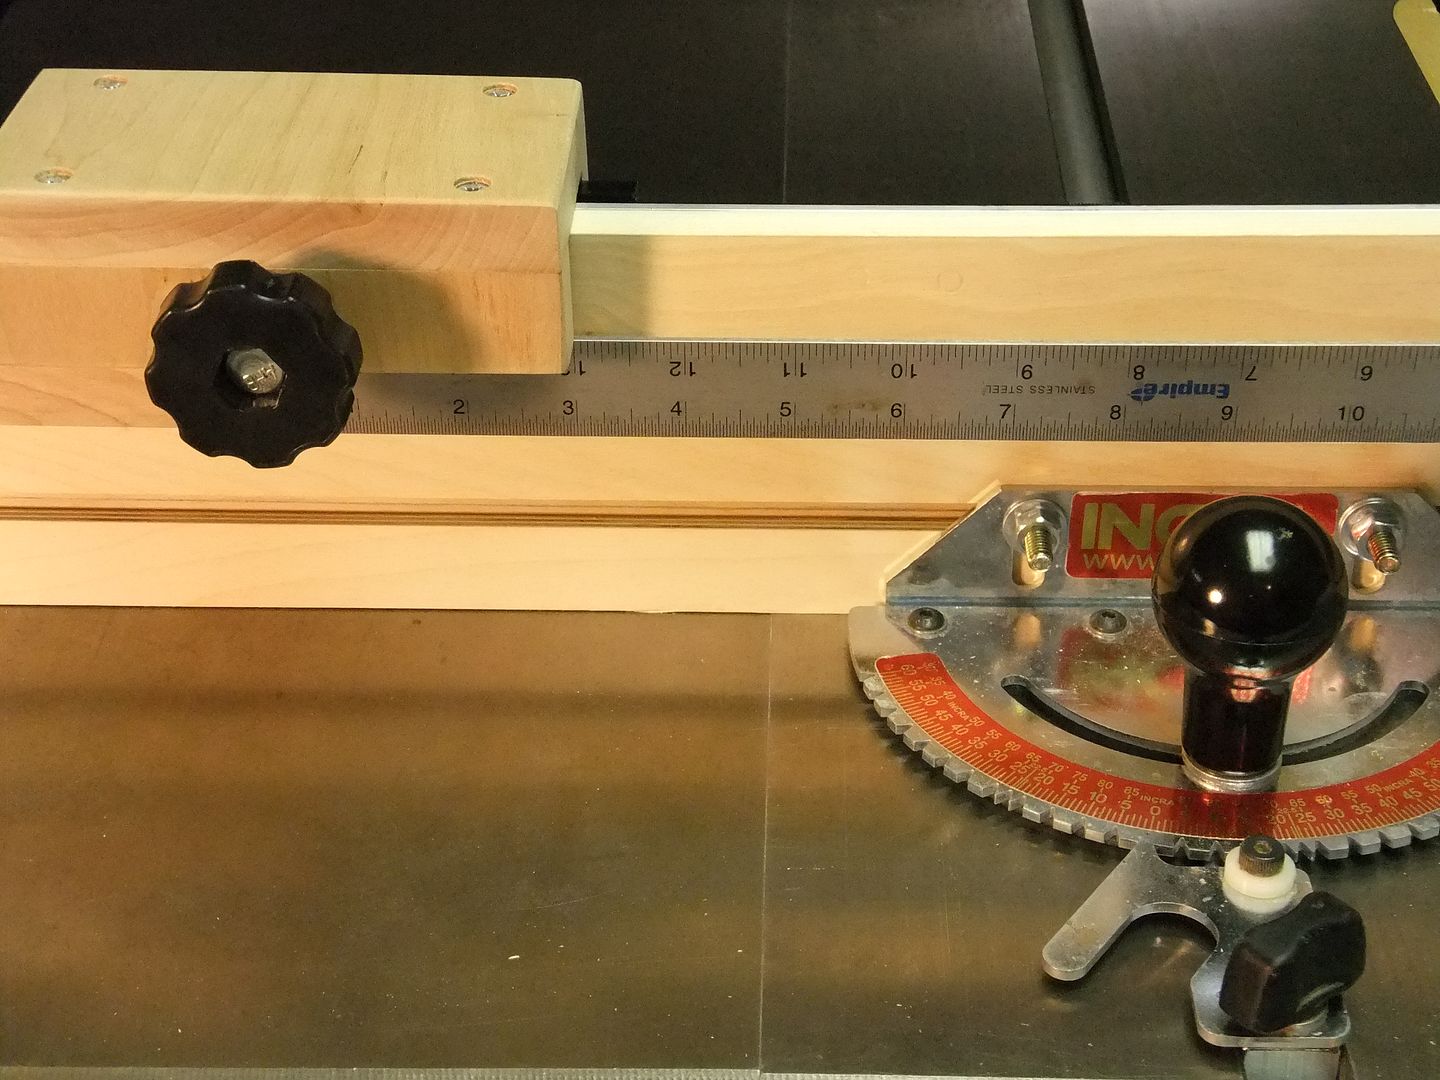
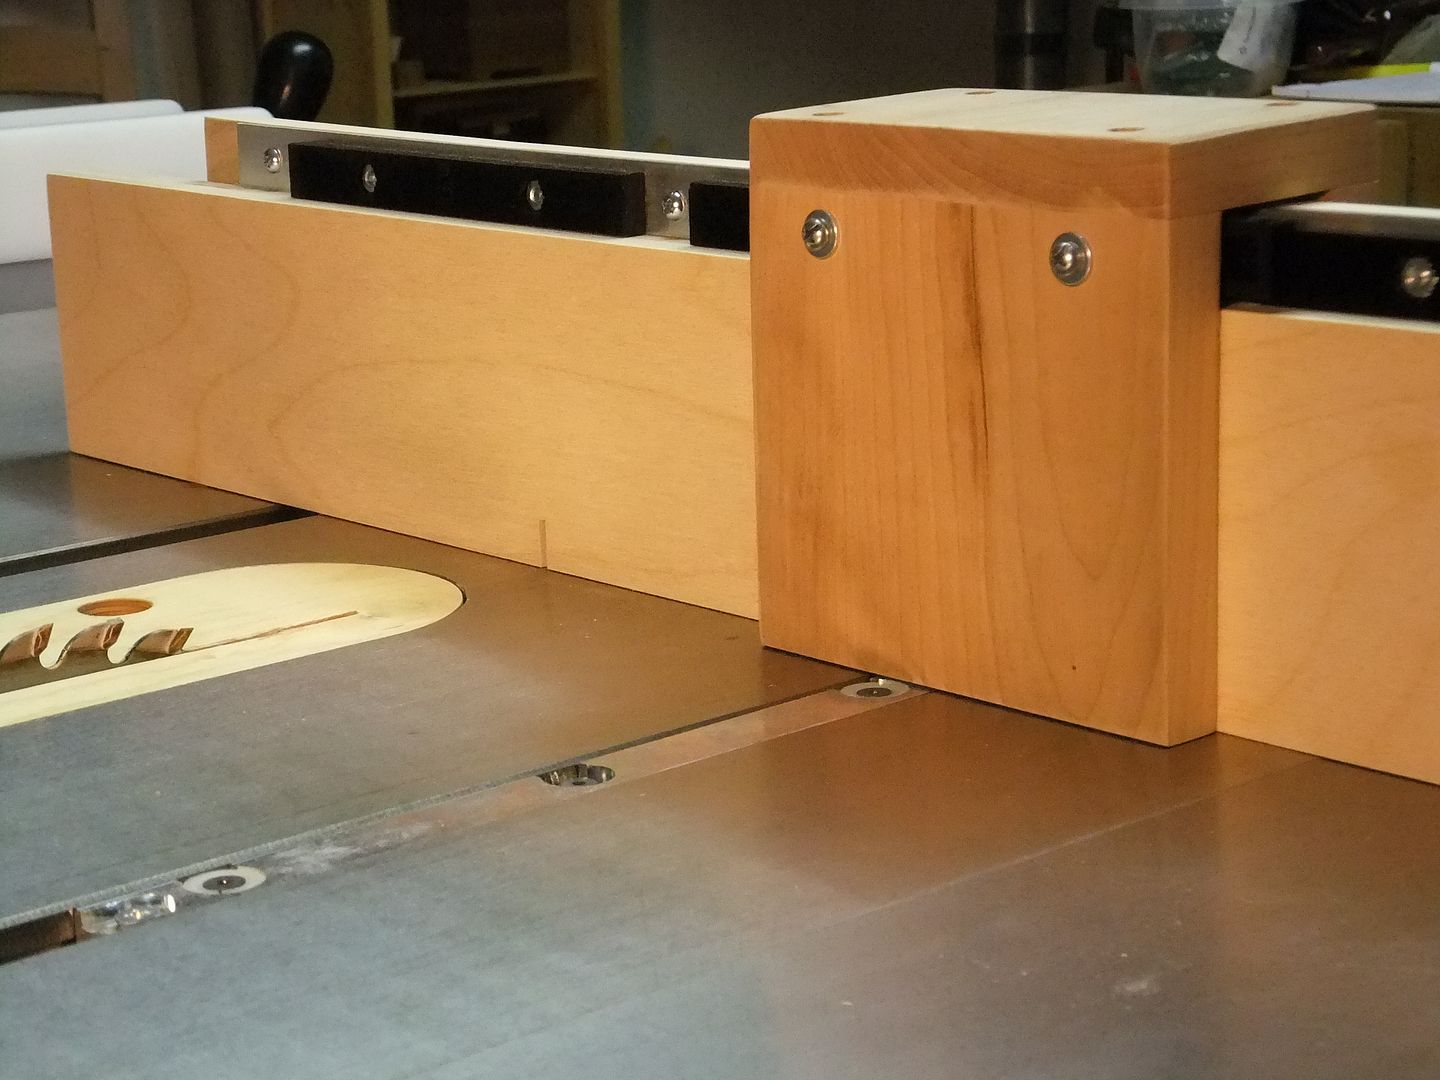
I mounted 4 of the racks to a strip of 1/8 inch thick aluminum. A pair of mated racks is about 5/8 inches so this sits nicely on top of a plain old 3/4 inch ply or MDF fence. (I am old school and don't like aluminum fences yet. I cut new zero clearance slots all the time. I made a new fence for these pictures). Then I mounted the aluminum strip on a piece of two inch tall, half inch ply. This assembly is now removable and can be mounted on a new fence. I also installed a row of small magnets to securely hold a ruler.
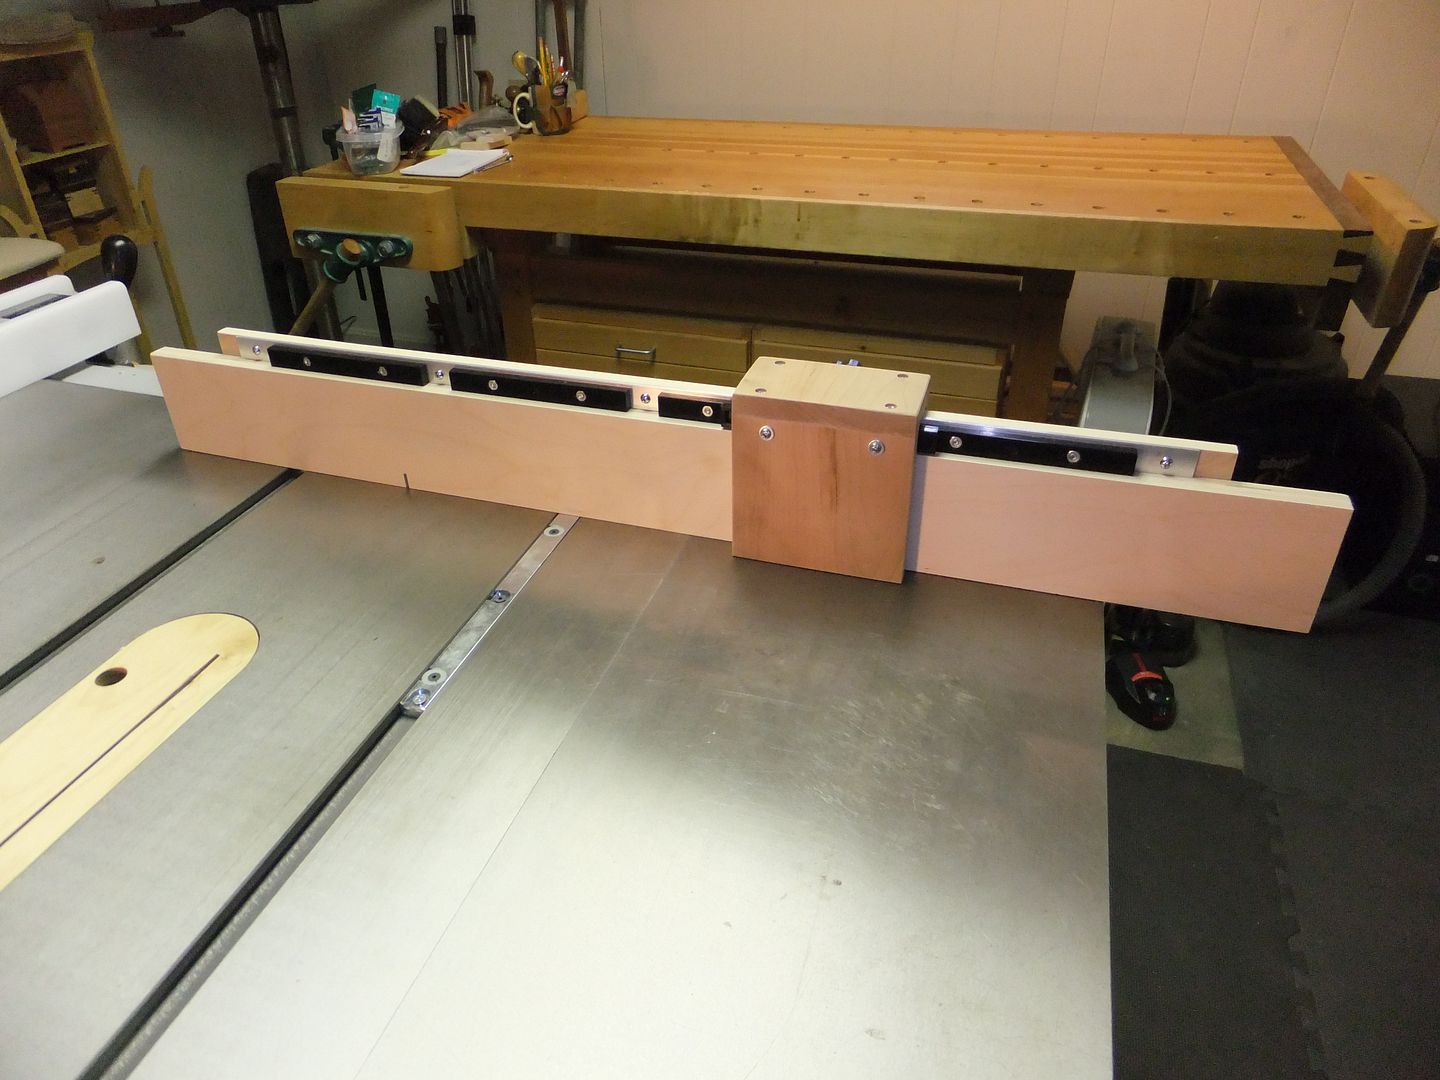
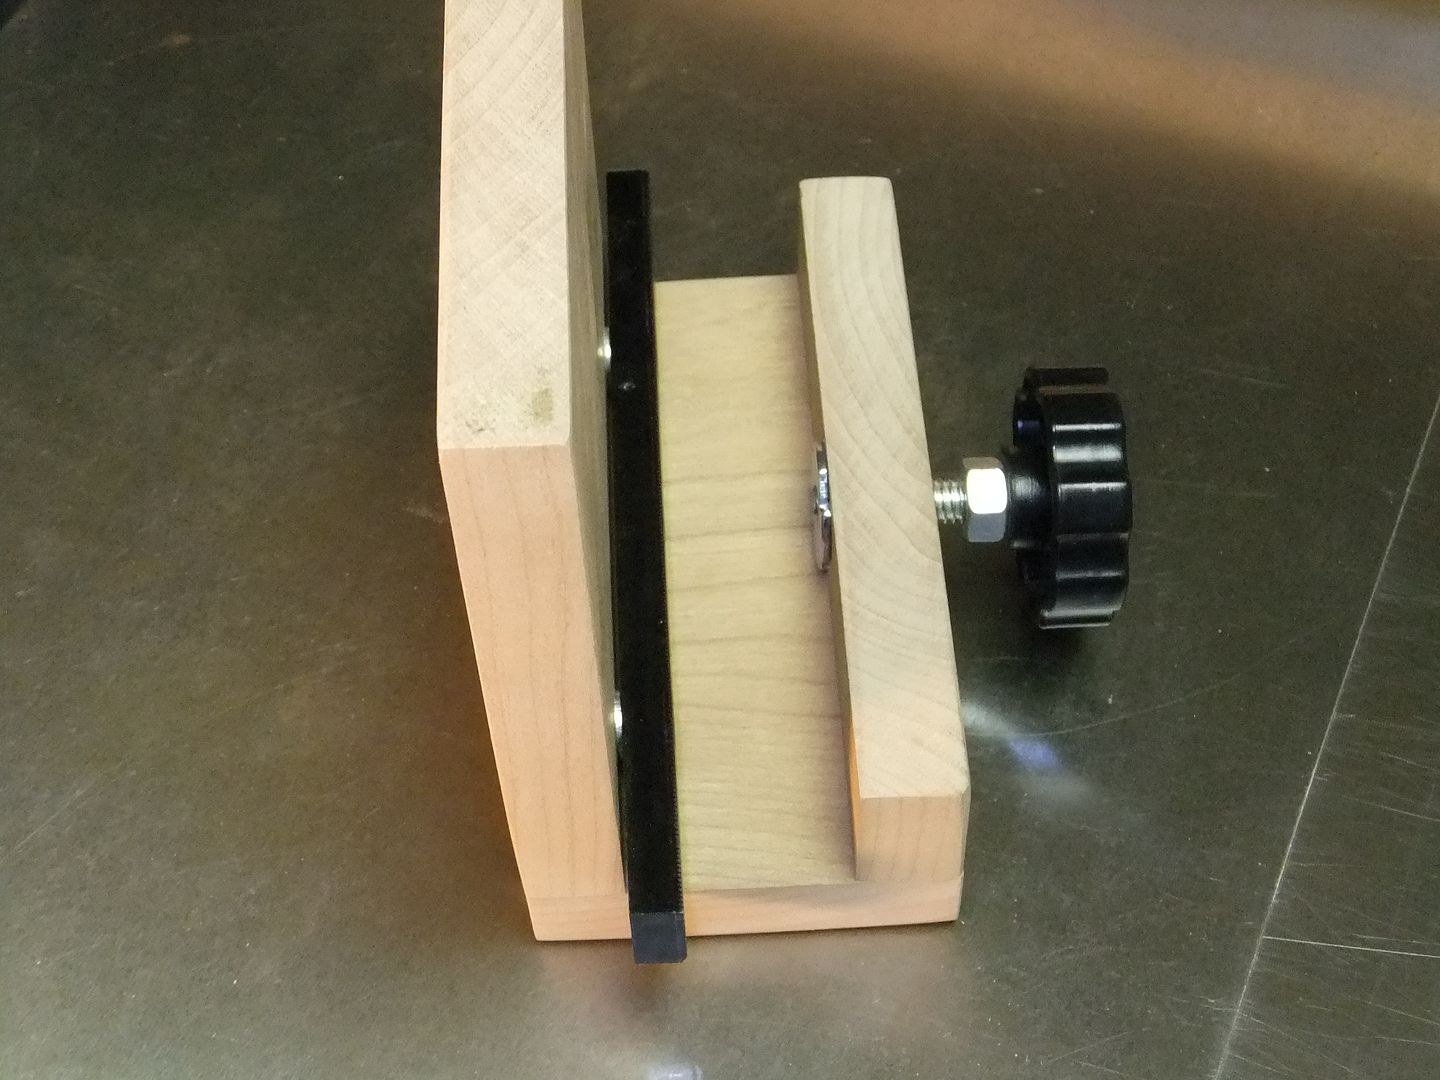
I then made a stop block with a rack inside and it also has a T-nut for the lock knob. It is kind of wide looking, but the screw holes in the racks are 4 inches apart. It hangs down 1 inch on the back and all the way to the table on the front. There is about an 1/8 inch gap on the inside when the lock knob is screwed out.
It works a charm. It's inexpensive. It's strong. Removal, moving, and re-installing the stop block is very smooth and easy. The whole thing can be moved to another fence in minutes.
.
![Image]()
.
![Image]()
.
![Image]()
.
![Image]()
.
![Image]()
.
![Image]()
.
![Image]()
.
Three items that immediately pop to mind that are missing from this design:
Micro Adjust is used to hit the spots between the 1/32 increments. The aluminum bar actually has slotted mounting holes in it so it could slide side to side with a screw adjustment on the side but I could not get this to work consistently and it added a lot of slop. Alternatively the side of the stop block could have a protruding adjustment screw. Or just use shims. 1/32 inch works for most projects.
Flip Stop is use to get the stop block quickly out of the way. This requires a hinge which is easy enough, but causes weakness and slop in the system. The block is easy to remove. Maybe I'll add it at a later date.
Thin or Pointy Stock Catch is used to keep work-pieces from wedging under the stop block. It is implemented by adding a small groove near the bottom of the fence and a protruding tenon that rides in the groove. This could easily be added.
Comments and suggestions are welcome. I just think this is kind of nice trick to add to a fence for any number of tools.
Steve
An incremental stop block is a stop block for a fence that can be moved in precise increments or can be removed and then returned to exactly the same spot at a later time. This is how Incra got its name. I am too cheap to buy an Incra fence, so instead I spend hours trying to save a buck or two. Go figure. I mostly like the feature of being able to put the stop block exactly back where I had it earlier - and I use pencil marks, not the ruler.
I had posted an incremental stop block a couple of years ago in a blog that used threaded rod. While it worked OK, it had a couple of problems; it wasn't strong enough for heavy use and it wasn't portable to a new fence once the old fence wore out. I wore it out.
So I decided to go simple and strong with a new design. I went and peeked around the Incra website and found the replacement racks for some of their fences. These are plastic like Legos, but have precision teeth on one surface that are spaced 1/32 inch apart. They are 6 inches long and attach with two screws. When two racks are mated to each other they are really locked in place. They are very durable while only costing $2 each. So I bought 10 of them, and used five for this project.
I bought them by going to this web address:
http://www.incrementaltools.com/PARTS_INCRA_Wonder_Fence_p/pc-wonderfence.htm
And then selecting item number 16 from the pull down list on the right hand side:
ID#16 - PULT - 500600 [Add $1.95]
I mounted 4 of the racks to a strip of 1/8 inch thick aluminum. A pair of mated racks is about 5/8 inches so this sits nicely on top of a plain old 3/4 inch ply or MDF fence. (I am old school and don't like aluminum fences yet. I cut new zero clearance slots all the time. I made a new fence for these pictures). Then I mounted the aluminum strip on a piece of two inch tall, half inch ply. This assembly is now removable and can be mounted on a new fence. I also installed a row of small magnets to securely hold a ruler.
I then made a stop block with a rack inside and it also has a T-nut for the lock knob. It is kind of wide looking, but the screw holes in the racks are 4 inches apart. It hangs down 1 inch on the back and all the way to the table on the front. There is about an 1/8 inch gap on the inside when the lock knob is screwed out.
It works a charm. It's inexpensive. It's strong. Removal, moving, and re-installing the stop block is very smooth and easy. The whole thing can be moved to another fence in minutes.
.
.
.
.
.
.
.
.
Three items that immediately pop to mind that are missing from this design:
Micro Adjust is used to hit the spots between the 1/32 increments. The aluminum bar actually has slotted mounting holes in it so it could slide side to side with a screw adjustment on the side but I could not get this to work consistently and it added a lot of slop. Alternatively the side of the stop block could have a protruding adjustment screw. Or just use shims. 1/32 inch works for most projects.
Flip Stop is use to get the stop block quickly out of the way. This requires a hinge which is easy enough, but causes weakness and slop in the system. The block is easy to remove. Maybe I'll add it at a later date.
Thin or Pointy Stock Catch is used to keep work-pieces from wedging under the stop block. It is implemented by adding a small groove near the bottom of the fence and a protruding tenon that rides in the groove. This could easily be added.
Comments and suggestions are welcome. I just think this is kind of nice trick to add to a fence for any number of tools.
Steve

") )
)

